Yepoleb
Opening Daikin Perfera FTXM-A Devices for Faikin Installation
I’ve just installed another Faikin board in my Daikin air conditioning and decided to document the process. Daikin keeps the instructions for opening the device quite hidden. They are neither in the manual or the installation manual, but only in the “Installer reference guide” or “Referenz für Installateure” if you want to add it to your collection of German manuals. The instructions are a bit confusing and might disappear at any moment, so I’m writing my own.
Disassembly steps
To ensure electrical safety turn off all inside units and unplug the outside unit or disconnect the breaker.
Open the lid by pulling it away from the device and remove it by pushing the mounting hooks to the outside. Remove the filters by unhooking them the bottom and pulling them out. This process is still well documented in the regular consumer manual. Wifi stickers on the case have been censored in the photo.
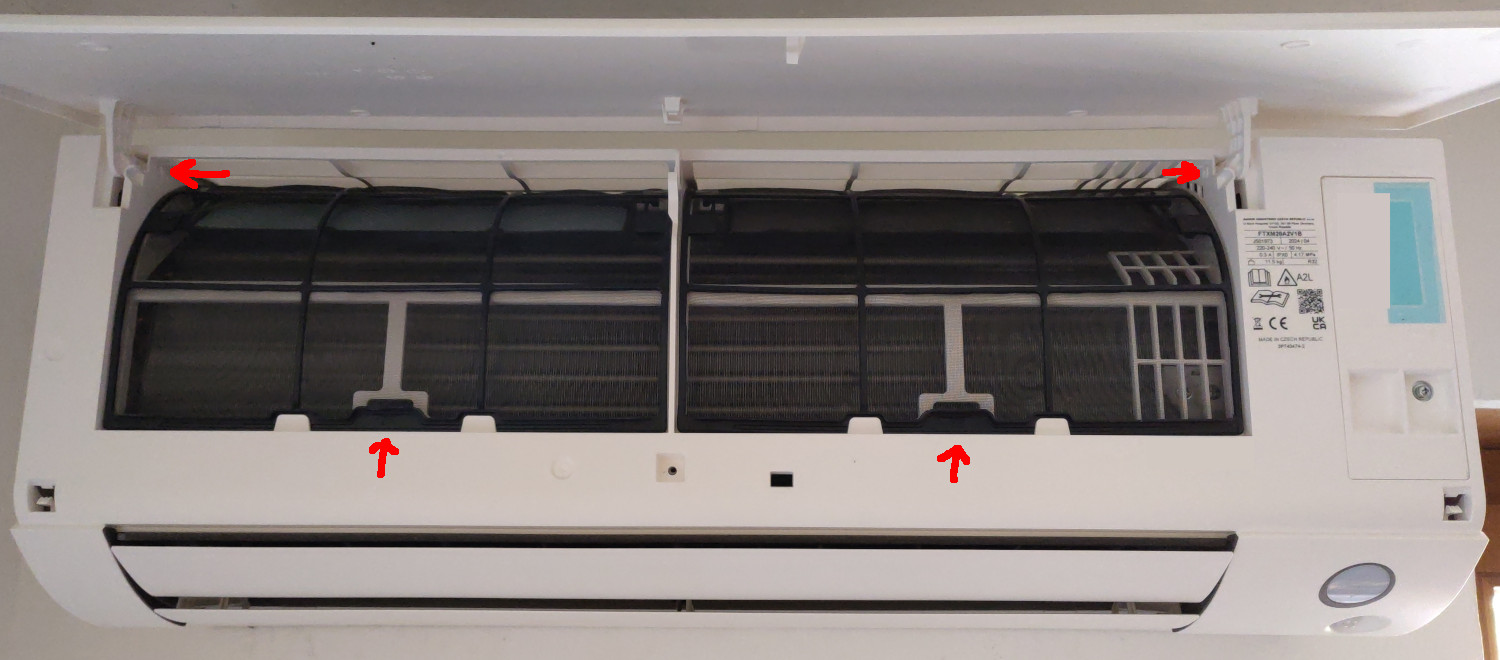
Remove the screw holding the maintenance cover in place on the right side of the device. All relevant screws have a PH2 head. Remove the flaps by bending them in an S-shape and pushing them to the left or right, whichever works best for you. The bending might require more force than you are comfortable with.
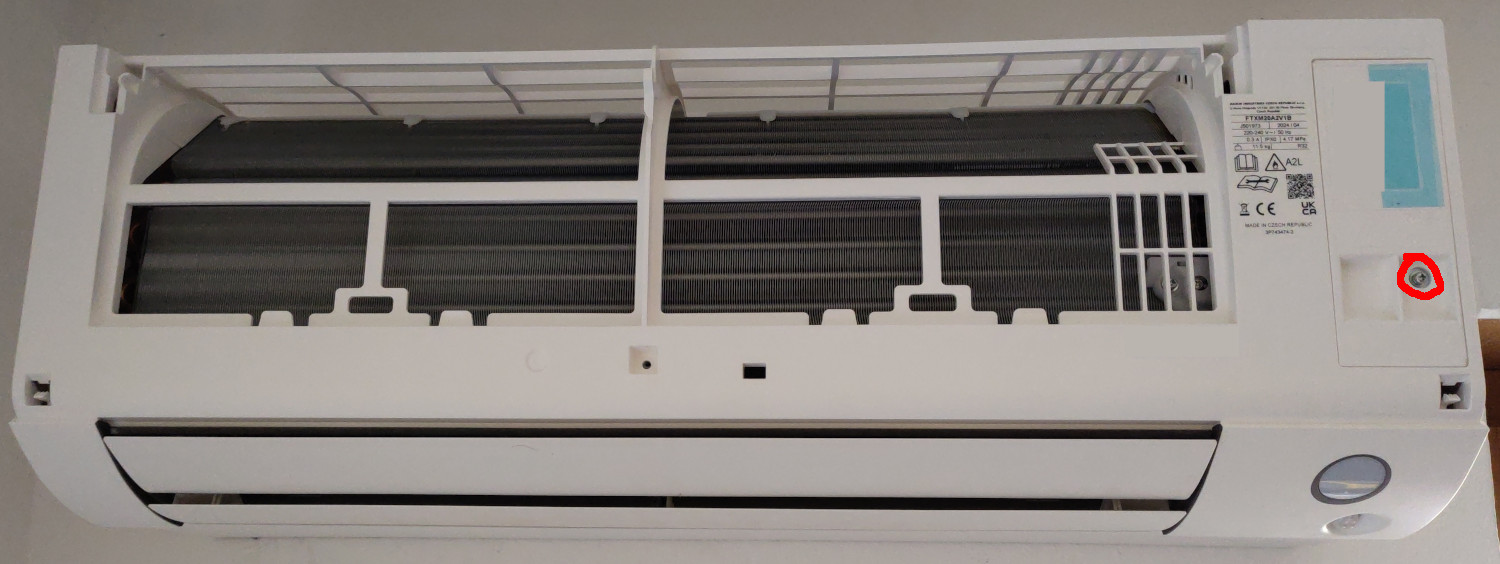
Remove the case screw covers by lifting up from the grooves. I did not need a special tool for this, fingernails were enough. Then remove the two screws inside.
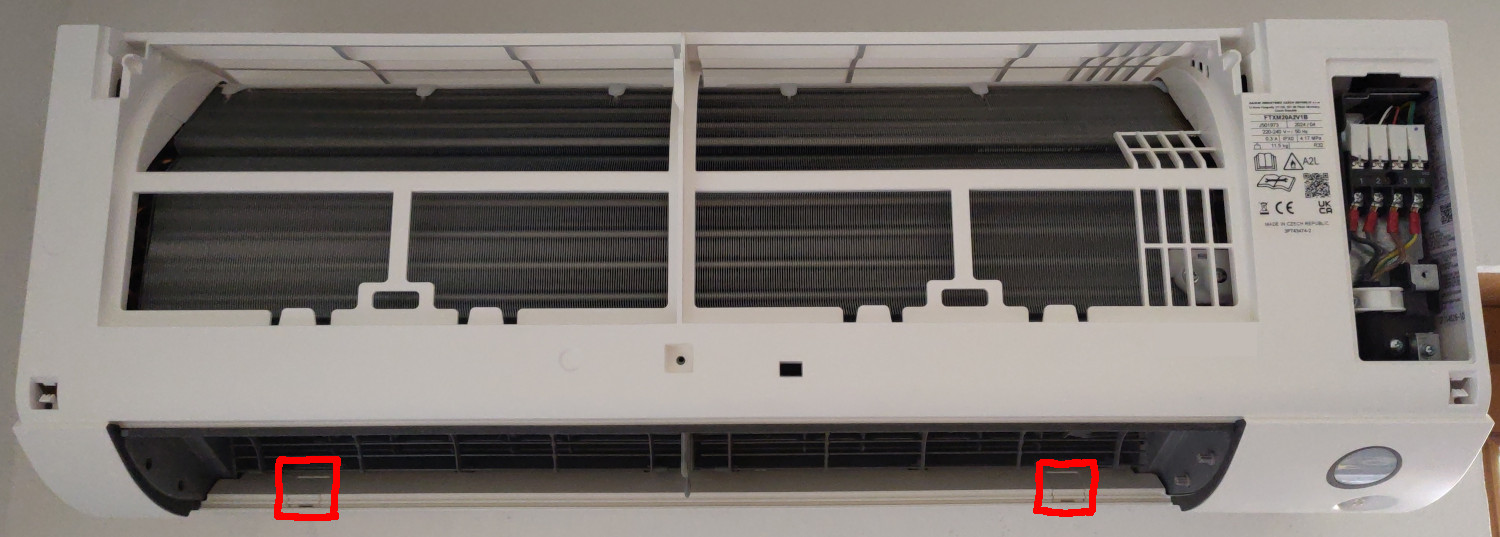
Now the main casing can be unhooked. On the top side of the back plate are three grey hooks holding it in place. The installer reference guide tells you to push them down, which I found impossible to do because of their stiffness. It is much easier to use them as leverage points for your thumbs and lift up the casing instead.
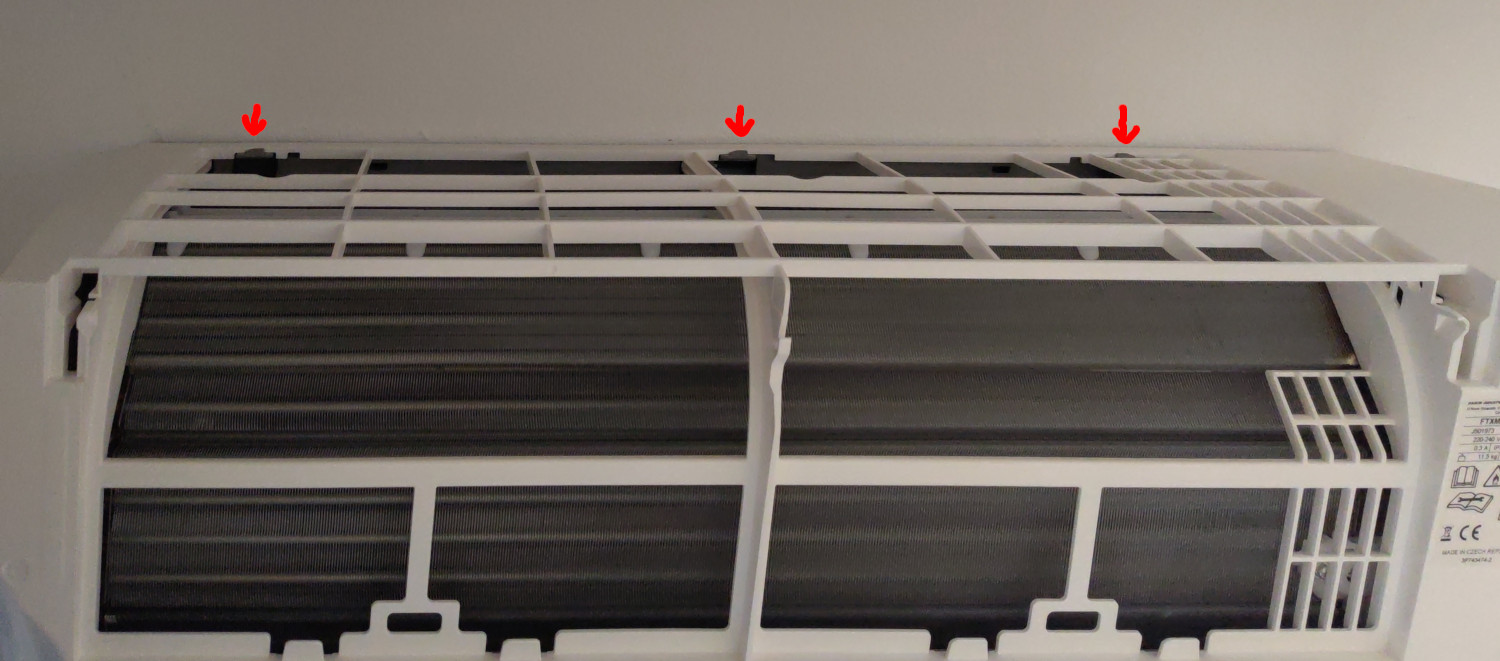
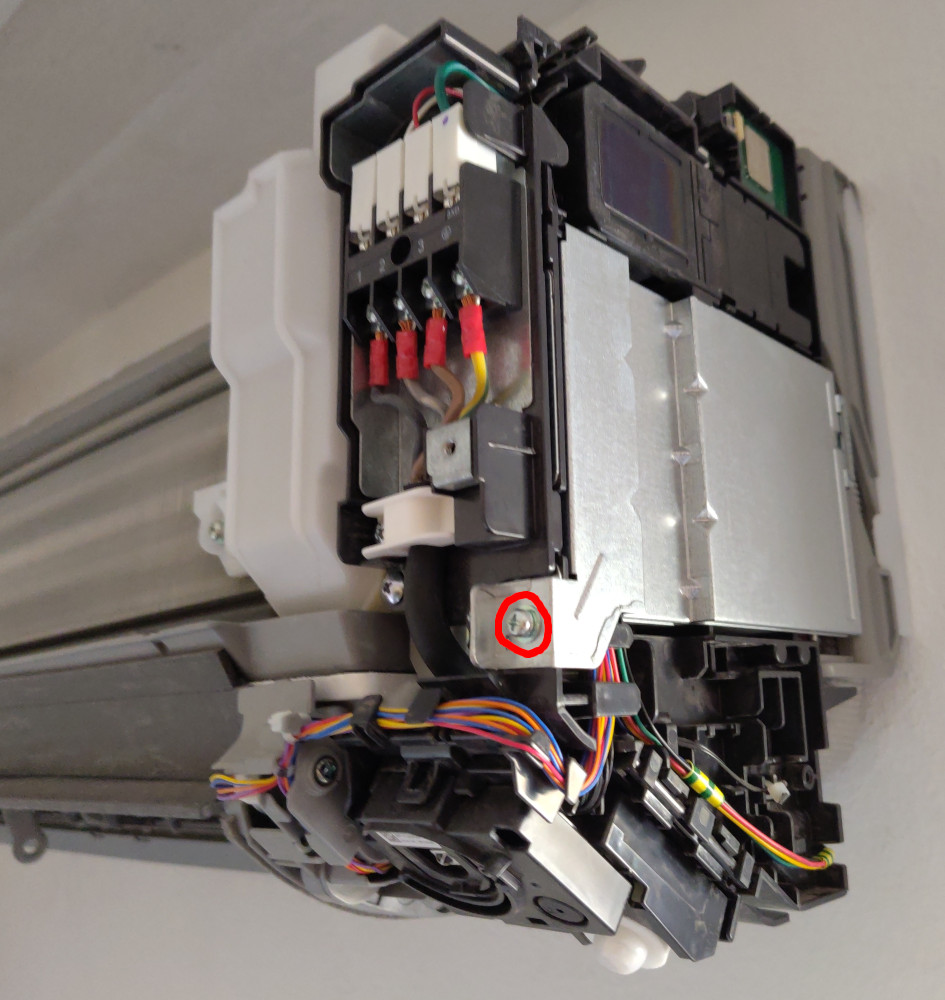
After removing the casing most of the inside components are accessible. As a last step the screw holding in place the electronics cover has to be removed. The cover is easy to pull off by pulling to the right at the screw location.
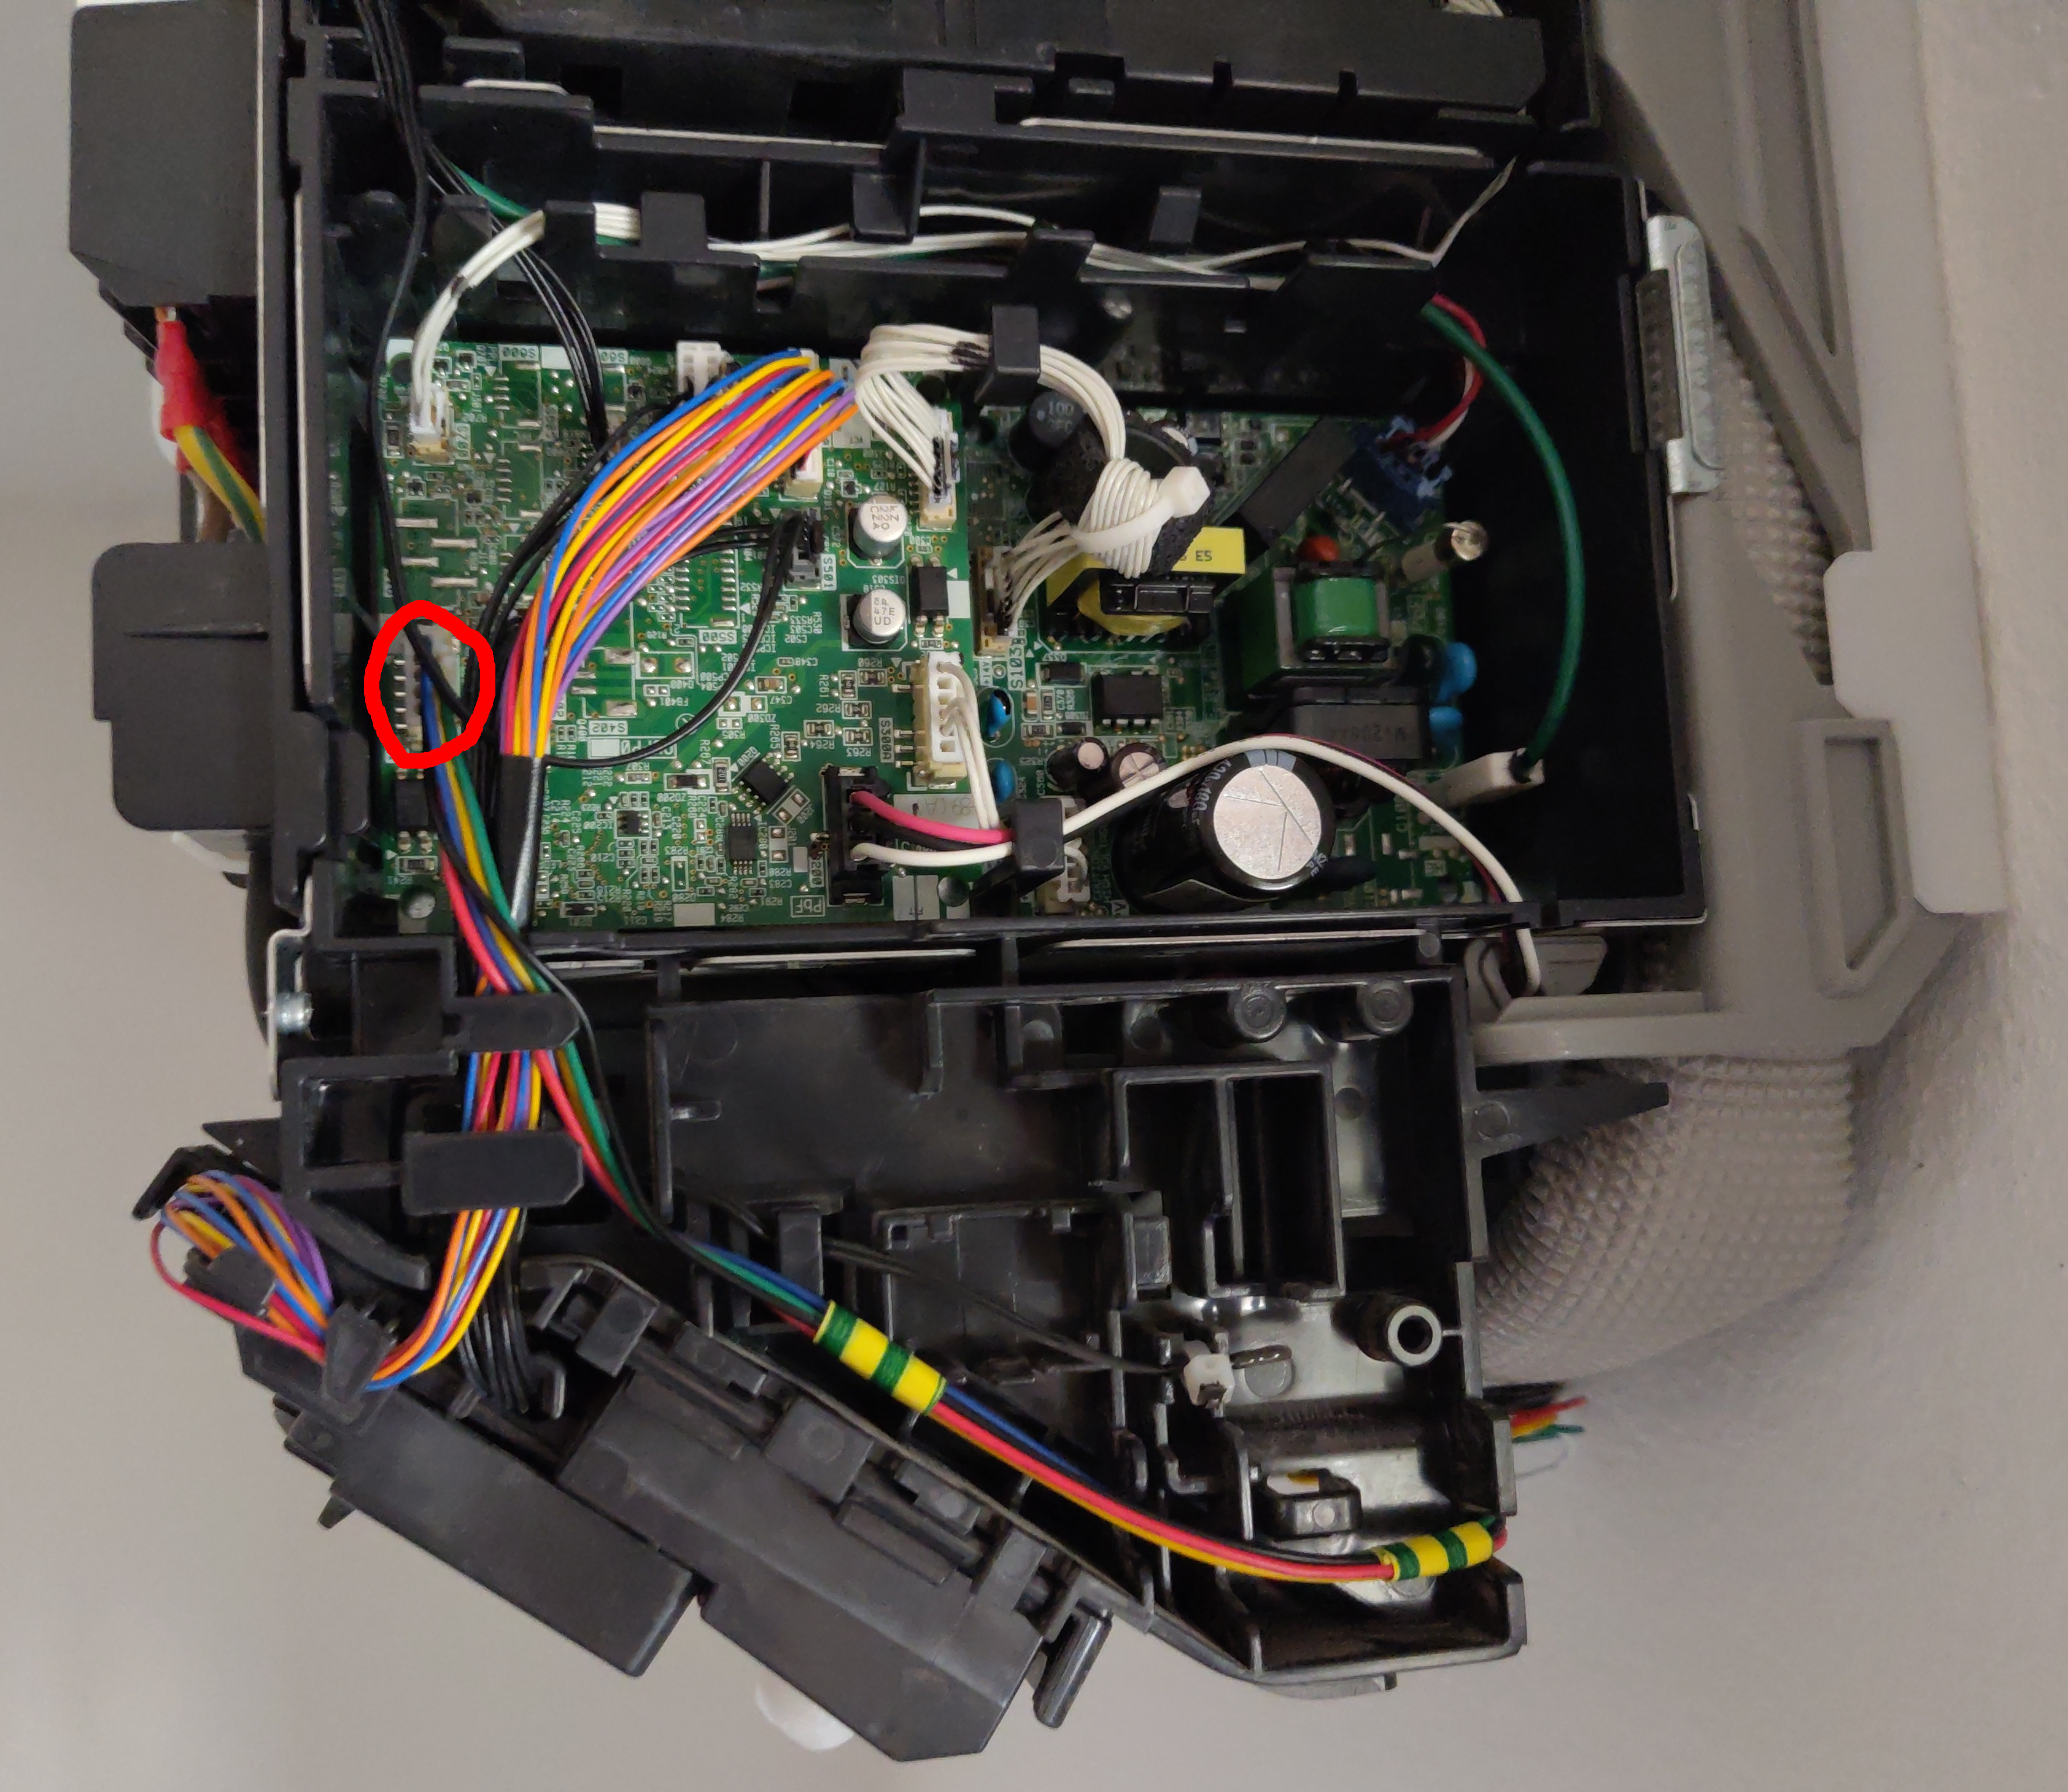
The last photo shows the location of the S21 connector and where to put the additional wires. I tucked in the Faikin board at the underside where the power cable and conduits are laid through.
Applicable devices
According to the installer reference guide these steps should work for the following devices:
- CTXM15A2V1B, CTXM15A5V1B
- FTXM20A2V1B, FTXM20A5V1B, FTXM25A2V1B, FTXM25A5V1B, FTXM35A2V1B, FTXM35A5V1B, FTXM42A2V1B, FTXM42A5V1B, FTXM50A2V1B, FTXM50A5V1B
- ATXM20A2V1B, ATXM20A5V1B, ATXM25A2V1B, ATXM25A5V1B, ATXM35A2V1B, ATXM35A5V1B, ATXM50A2V1B, ATXM50A5V1B
The FTXM-R series has mostly the same steps, but is not identical. I might document them at a later time. Feel free to email me if you get stuck.